
ABC: Always Be Checking out
Appointments can only be invoiced once they are in the checked out status. It is crucial to confirm what each appointment is charged before billing the volume client. This can be done from each animal’s Checkout page Financial tab. To get there, go to Clients > Check In/Checkout > Check In/Checkout and click on the animal’s status. Then, move to the Financial tab.
A summary of all charges for that appointment are listed here. Sex affects the price for each animal, as does the number of services performed during the surgery. So, it’s important to get any changes that happened during surgery into the computer system before checkout. Once you have generated an invoice for the appointment, you are not able to easily change these details.
If any subsidies or discounts need to be applied, do so before generating the invoice.
Billing Volume Clients
Once the appointments are checked out, go to the billing screen. If you are on the Financial tab, there is a shortcut in the upper right corner labeled Go to billing screen. If not, go to Accounting > Volume Clients > Bill.
Follow these steps to bill the volume client:
- Select the date range and find the volume client you are needing to invoice.
- You will see a charges total column on this page. To view all the appointments within these charges, you can click on the volume client’s name.
- To generate the invoice, tick the Bill & Mail box and click Generate Invoices.
The volume client will receive an email containing the invoice. This can be paid through their Volume Client Portal (VCP) or your clinic can apply payment internally.

Payment through the VCP
The best way to collect payment from volume clients is through the Volume Client Portal (VCP). This allows the client to access and pay their invoices on their own. Learn how to set up the VCP here. Your clinic must utilize our integrated credit card processor to enable this.
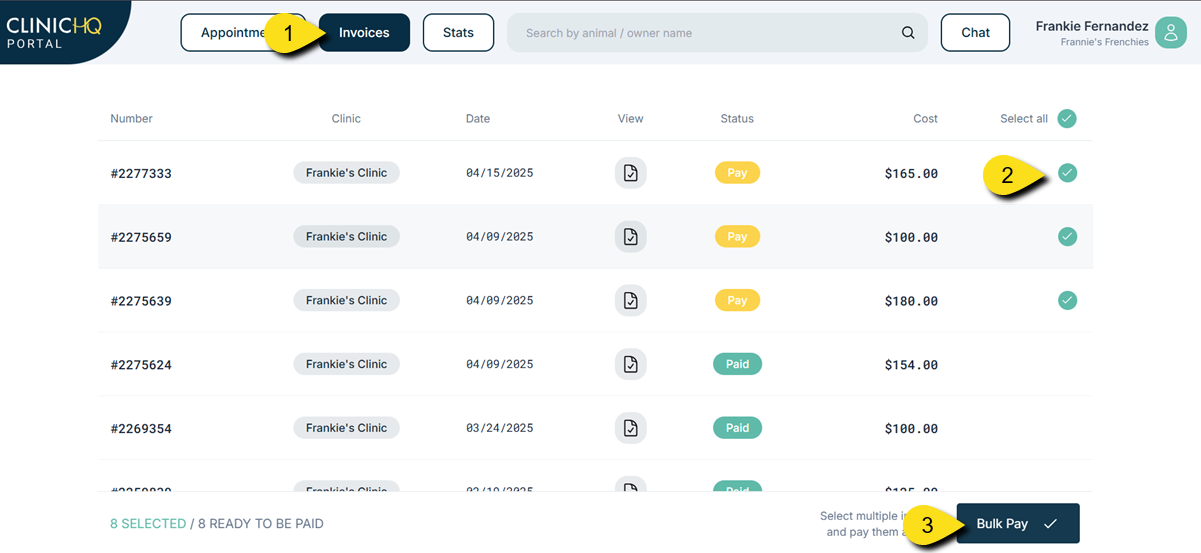
- The client will go to the Invoices page. Here they can view all paid and unpaid invoices.
- Next, they will select the invoices they want to pay.
- They will click Bulk Pay and a popup will appear to collect their card information. Volume clients can vault their card to shorten this process for future appointments.
Apply Payment Internally
- To process a payment for the volume client internally, go to Accounting > Volume Clients > Apply Payment. All unpaid, billed appointments will be listed here.
- Find the volume client’s name and click Pay.
- A list of unpaid invoices are displayed. Select all invoices you are wanting to pay.
- Select the Payment Date. By default, this is filled in with today’s date.
- Select your tender type (i.e. Cash). Include any important financial notes in the textbox.
- Adjust payment amount if necessary. This is automatically filled in with the unpaid balance total.
- Click Make Payment.
Note: If a split payment needs to be processed, you can click Add Additional Payment Type.