


Prescriptions are a normal part of clinic operations. Some clinics do prescriptions for every patient, some do only a couple per day. Either way, HQ makes it easy to print prescription labels.
Prescriptions are tied to items. For example, if you do a prescription for amoxicillin you would set this up in settings so when you add this item, it has everything you need already keyed up.
To Do a Prescription:
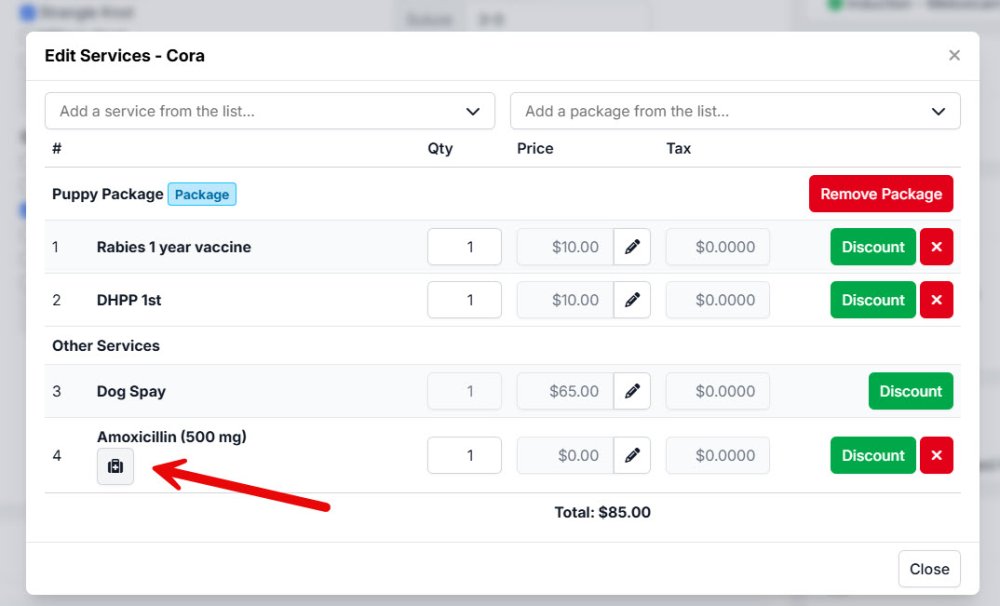
- Add the prescription item as a service item (ensuring the settings have been properly done for the item). The item can be added at any point. It can be added before the appointment even. It is most commonly added either before an appointment or during the Surgical phase. To add an item in Surgery tab, click the Update link in Services boxes. Note: To add an item in exam or drug draw phase, simply click on the box in the grid that has services. You’ll be able to add from here.
- Once you click Update in the Item box, and add the item, you’ll see a little icon for the item. You can click this icon, follow the prompts and print the label.
Bulk Prescription Label Printing
If you do a lot of prescriptions you’ll want to use the Rx screen in Patient Flow. This allows you to click Print on each prescription and print them one right after the other.

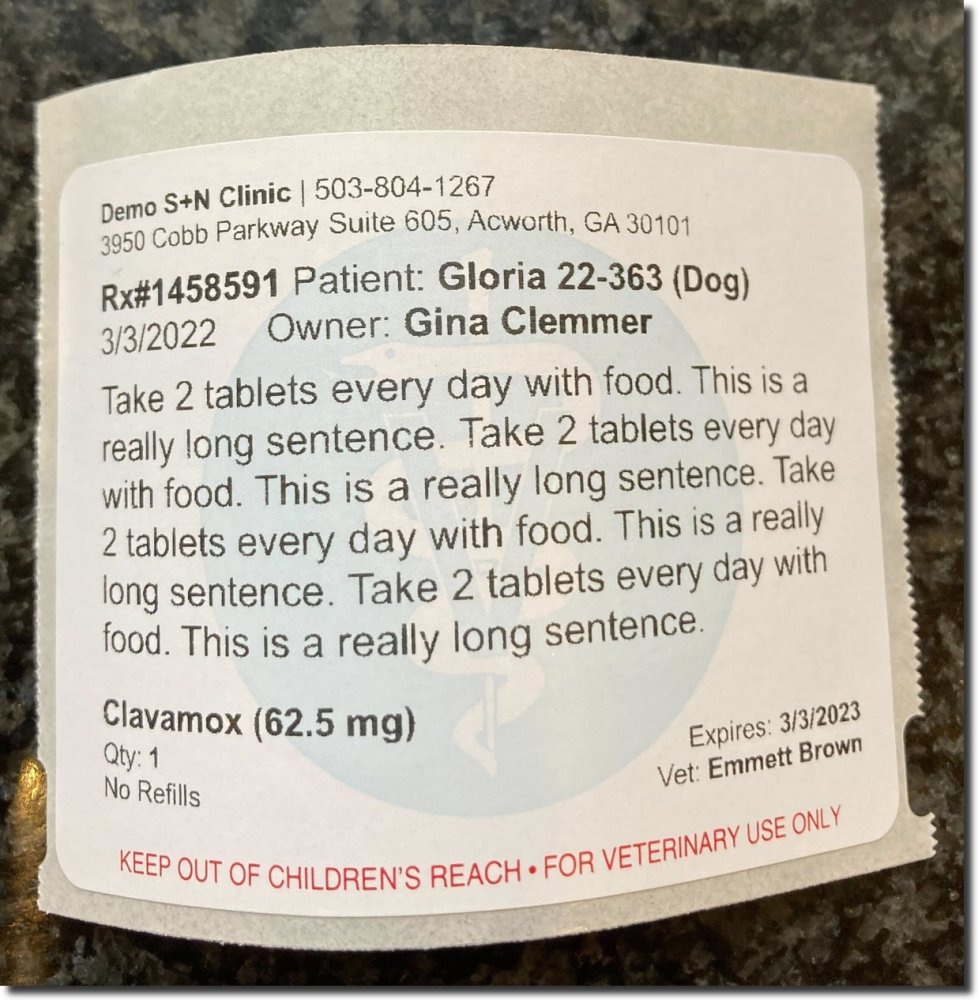
It should look similar to this:
Troubleshooting Label Printing Issues
Follow this Dymo troubleshooting guide separated out by issue and printer type for instructions on how to resolve printing issues.
Setup Dymo Label Writer
Follow the instruction from Settings for Dymo Setup HERE.
Copyright © 2025 Clinic HQ
—
Powered by 